
Plywood is an integral part of modern construction and interior design. This versatile material, made from thin layers of wood glued together, plays a vital role in creating durable and aesthetically pleasing structures. In this article, we’ll take a deep dive into the plywood manufacturing process, uncovering the secrets behind its strength and versatility.
What is the Structure of Plywood?
It is composed of multiple layers of veneer sheets that are bonded together. The typical structure includes the following layers:
- Face Veneer: Manufacturers often use high-quality veneer to create the outer layers. They select the face veneer for its attractive appearance, as it becomes the visible surface of the plywood.
- Core Veneer: Core veneers are the inner layers between the face veneers. They provide structural support and contribute to its overall strength. Core veneers are usually made from lower-grade wood.
- Glue: The adhesive used to bond the veneer layers together plays a crucial role in the structure of plywood. It is selected based on the intended use of the plywood, with waterproof adhesives being common for exterior applications.
The arrangement of these layers, along with the quality of the veneers and adhesive used, determines the strength, durability, and appearance of the plywood.
11-Step Plywood Manufacturing Process
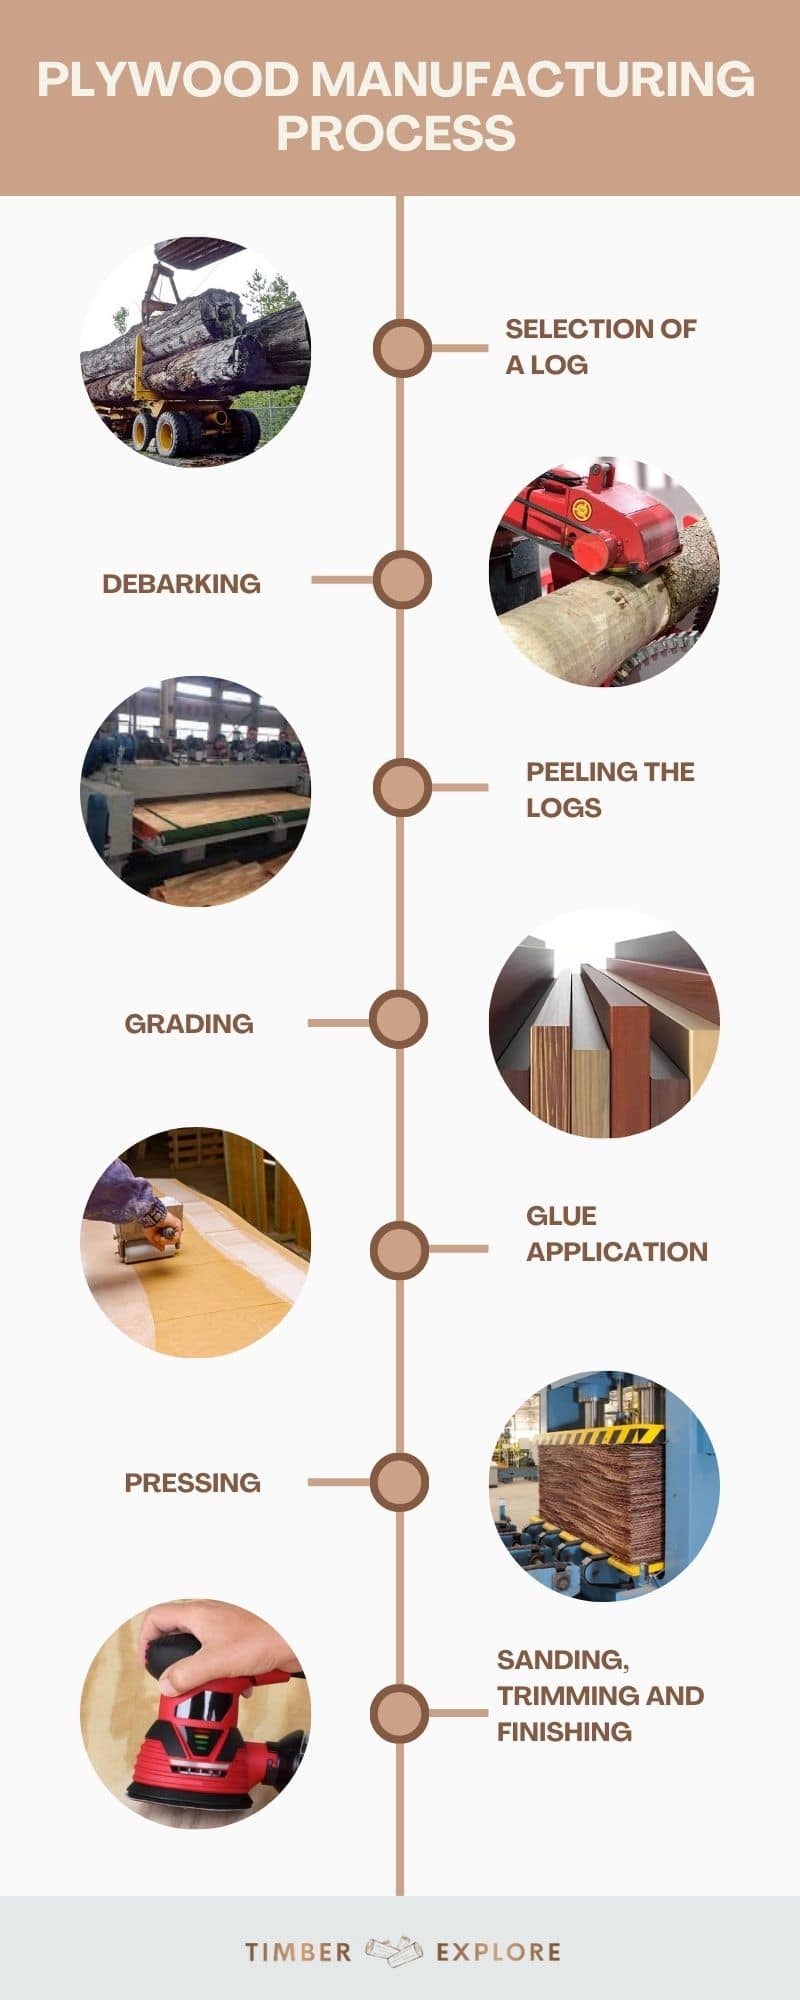
Step 1: Sourcing Raw Materials
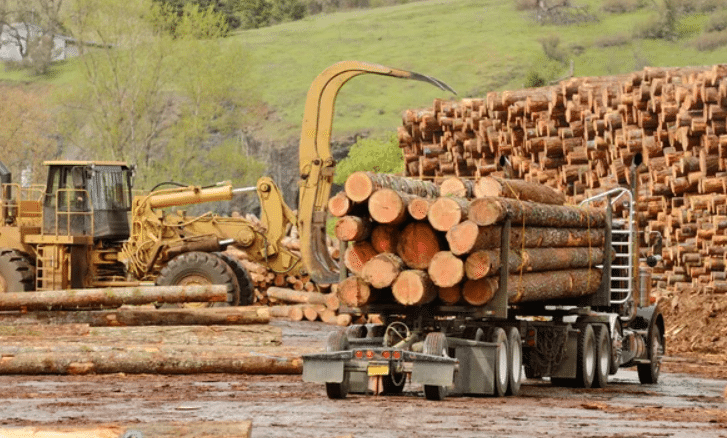
The first step of the plywood manufacturing process begins with the selection of high-quality raw materials. The primary source is timber, typically obtained from sustainable forests. Trees are carefully chosen for their wood quality and environmental sustainability. Once harvested, the logs are transported to the plywood mill.
Step 2: Debarking and Peeling
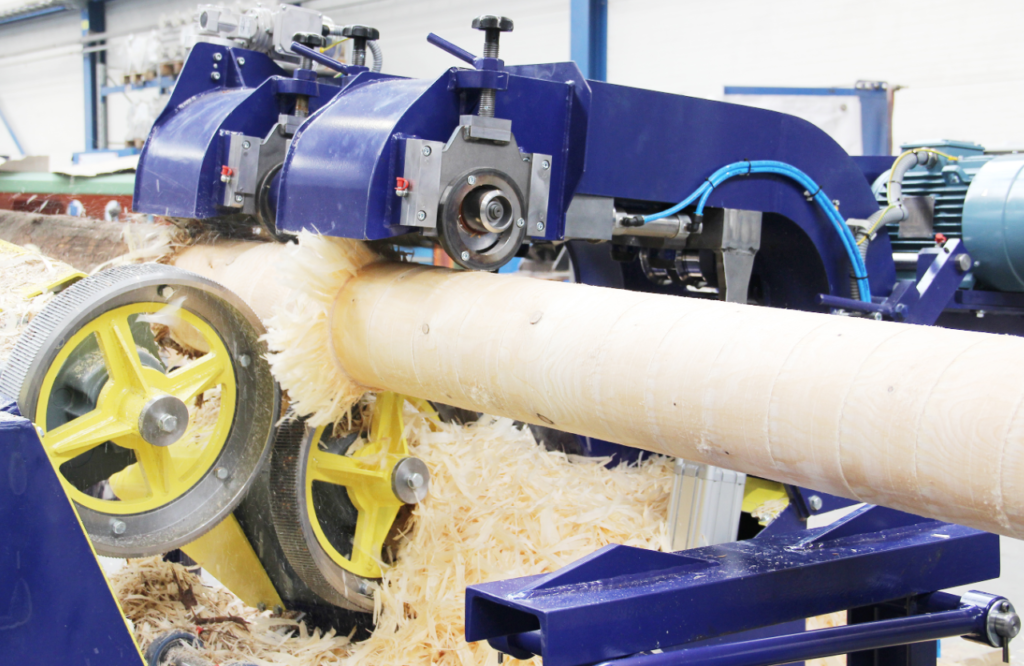
Workers at the mill conduct a thorough debarking process to remove the outer bark from the logs with the help of a debarking machine. This crucial step ensures that only the wood’s purest form is utilized in the manufacturing process. After debarking, the logs undergo a transformation into large, thin sheets through a process called veneer peeling. This transformation occurs by rotating the log against a blade, producing continuous sheets of wood, which are known as veneers.
Step 3: Veneer Drying
Once the logs have been freshly peeled, they hold excess moisture that requires removal. Subsequently, the veneers undergo drying in a controlled environment to reach the desired moisture content, ensuring stability and preventing warping.
Step 4: Sorting and Grading
In the next step, the veneers are sorted and graded based on their quality and thickness. The highest-quality veneers are typically used for face layers, while slightly lower-grade ones are designated for the core layers. This grading process ensures that each sheet contributes to the overall strength and appearance of the plywood.
Step 5: Gluing
The veneers are then glued together in a sandwich-like structure. The adhesive used can vary but is typically a waterproof adhesive for exterior-grade plywood. The glue is spread evenly, and pressure is applied to ensure strong bonding.
Step 6: Pressing
Cold pressing is an initial step that serves to initial bonding between the veneers, with excessive drying, and maintaining optimal moisture content. The stacked veneers then enter the hot press where both heat and pressure are applied simultaneously. This process activates the adhesive and forms a solid bond between the layers, resulting in a strong and stable plywood sheet.
Step 7: Trimming and Cutting
After pressing and curing the panels, workers trim them to the desired dimensions and cut them into standard sheet sizes. The precision of this step ensures uniformity and consistency in the final product.
Step 8: Sanding
After trimming, the sheets undergo a sanding process to smooth the surface and remove any imperfections. This step ensures a flawless finish and prepares the plywood for various finishing treatments, such as staining or painting.
Step 9: Inspection and Quality Control
Quality control is a vital aspect of the plywood manufacturing process. Sheets are carefully inspected for defects, ensuring that only top-notch products leave the factory. This rigorous quality control guarantees that it meets industry standards and is suitable for a wide range of applications.
Step 10: Surface Treatment (Optional)
Depending on the intended use, plywood may undergo additional surface treatments such as painting, staining, or laminating to enhance its appearance and durability.
Step 11: Packaging and Distribution
Following stringent quality checks, workers package the plywood sheets by typically stacking them and wrapping them in protective materials to prevent damage during transportation. Subsequently, they ship them to retailers, construction sites, and manufacturers.
The plywood manufacturing process is a complex and fascinating journey from tree to construction site. With its strength, versatility, and sustainability, plywood continues to be a top choice for architects, builders, and interior designers. Understanding the meticulous steps involved in its production at Timber Explore would help you appreciate this remarkable material’s role in creating sturdy and beautiful structures. Whether you’re a professional or a DIY enthusiast, this knowledge can empower you to select the right plywood for your project, ensuring its success and longevity.